Using Netlify To Host
Your Web Application
This eLearning video was created to help Netlify customers learn how to host their static web applications on Netlify. Netlify is a cloud computing company that offers hosting for web applications and static websites. Among its different services, plans, and price options, Netlify offers a starter plan providing free hosting for personal projects, hobby sites, or experiments. If a customer wants to share a personal website he or she has created across the web, hosting is needed to be able to share it with others. Netlify's free plan not only allows one to host his or her website for free, but it also provides a free domain name that can be shared with others. This video is intended for those who are using Netlify to host their web applications for the first time, or for those who may be unsure as to how to go about doing so, or need a reminder as to how to do it.

Tools Used:
Camtasia, Snagit
Video
Challenge
Hosting a static website or web application for the first time, or on a new service for the first time, can be challenging. There are different services available that can be used to host web applications (e.g., GitHub). I remember when I first started using Netlify to host my applications, it was challenging at first, especially because it was the first time I had used Netlify for hosting. As always when learning something new, I took notes of the steps that are needed when going through the process of hosting a web application. I created this video to help Netlify customers learn the steps that they need to take to host their own web applications using Netlify.
Solution
I created this video using Camtasia and Snagit. I decided to go through actual the process of hosting a web application that I had previously created to ensure that the steps that I showed in the video were accurate and up-to-date. I recorded my screen using Camtasia Recorder as I went through the steps. These video captures were used in the video, including the use of a screenshot captured with Snagit. During the video production, I used zooming techniques and features like Sketch Motion and Highlight to bring the learner's attention to important parts of the video, such as showing which button to click, bringing attention to important messages on the screen in the Netlify dashboard, etc. By doing so, the learner would know what to focus on each step of the way, so that the learner would know what to notice and what action to take (e.g., clicking a particular button, typing in the name of the project, etc.). In addition, I added transition text introducing each step of the process, so that the learner would be aware of each step (e.g., "Create a GitHub Repository for Your Code"). At the end of the video, the learner is shown how to open their live application, along with an example of the application that is deployed in the video.
Result
After viewing the video, learners should be able to follow the steps taken in the video and deploy and host their own static web applications. If necessary, the learners will be able to rewatch parts of the video that they need to rewatch, pausing at certain points if necessary. In addition, the video captures of each step and effects used for drawing attention ensures that learners know exactly what to do at each step. As a result, learners should be able to deploy and host their static web applications on their own with ease using Netlify.
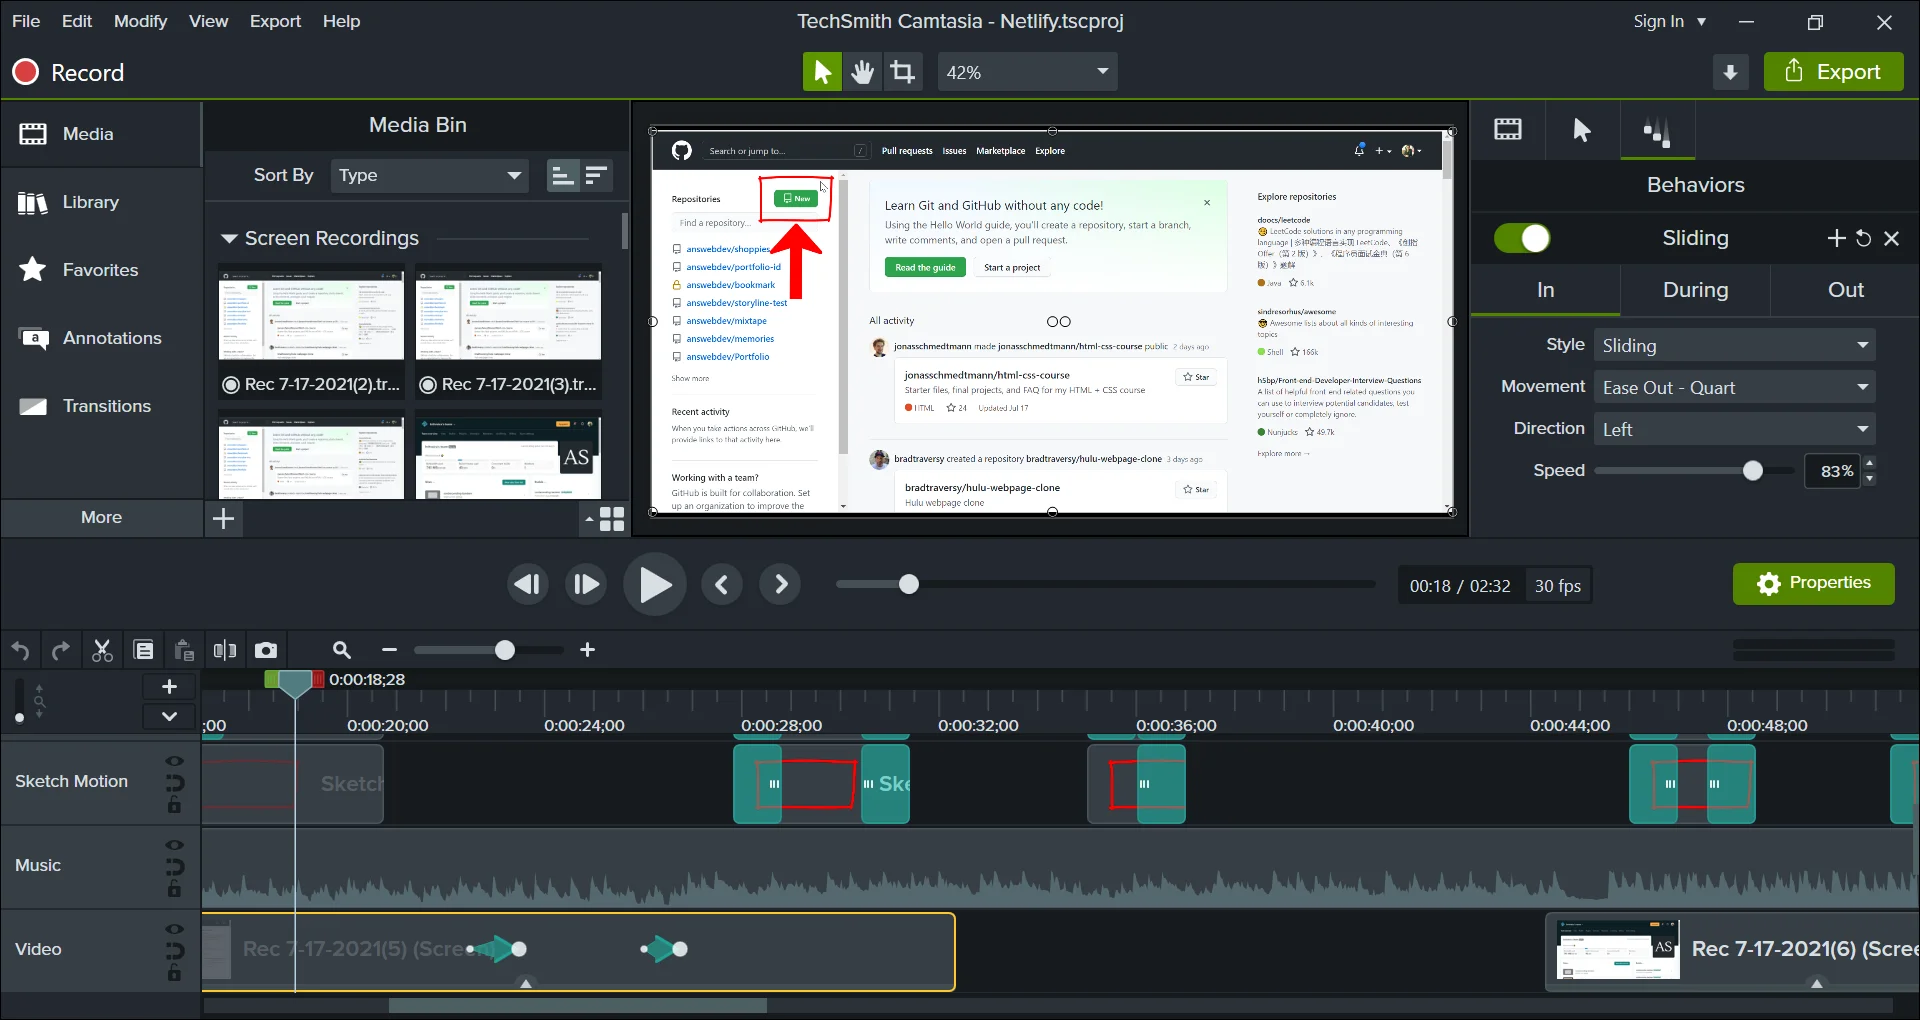
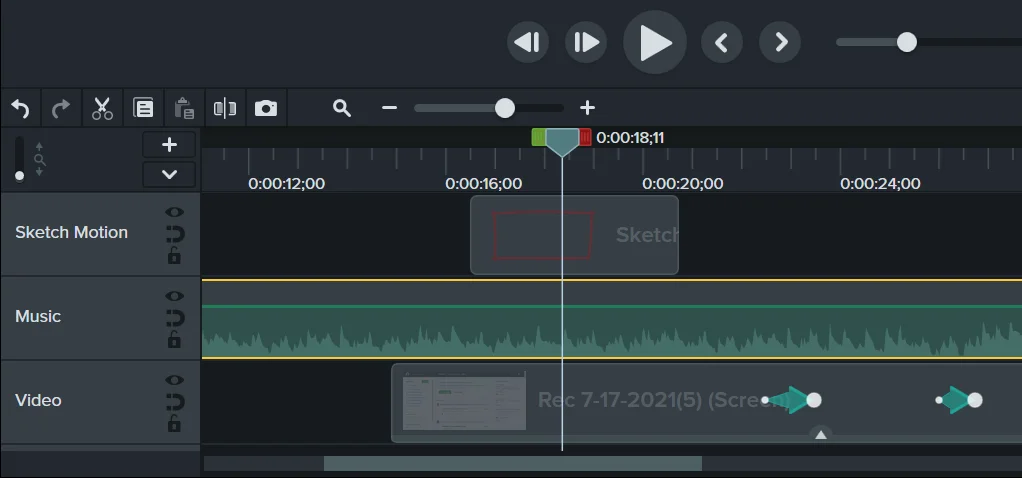
Video Production
After I imported the video files into Camtasia, I began putting everything together. I added effects, animation, background music, and added transition text to introduce each step of the process. Throughout the video, I wanted to highlight some of the points of the video that I wanted the learner to focus on, such as focusing on important messages, which input fields to type in text, which buttons to click, etc. For this reason, I used effects in Camtasia, such as using arrows and Sketch Motion to draw a square around certain elements I wanted to learner to focus on, using the Highlight effect to highlight important messages to notice, and zooming in at certain points to ensure that the learner knows what to notice, particularly on text- and/or element-heavy pages.
For the visuals, I added fade-in and fade-out animation effects on the transitions before and after the different video clips. I also added a slide-in effect to introduce each video section. These effects, along with the upbeat background music, were added to make the experience more aesthetically pleasing to the learner. Finally, in keeping with the Netlify branding, I used the Netlify logo in the opening slide in the video.
Production Screenshots